Indicators on "DIY Manicure Kits: The Must-Have Essentials for Salon-Quality Nails at Home" You Should Know


Step-by-Step: How to Construct the Perfect DIY Manicure Kit
Are you weary of spending a lot of money at the nail beauty shop every time you really want a clean manicure? Making your personal DIY manicure kit can easily spare you opportunity and cash, while still providing you salon-quality results. In this step-by-step resource, we will definitely reveal you how to put together the ideal DIY manicure package that will definitely have your nails looking exquisite in no time.
Action 1: Collect Your Supplies
The very first step in setting up your DIY manicure set is collecting all the important source. Below's what you'll require:
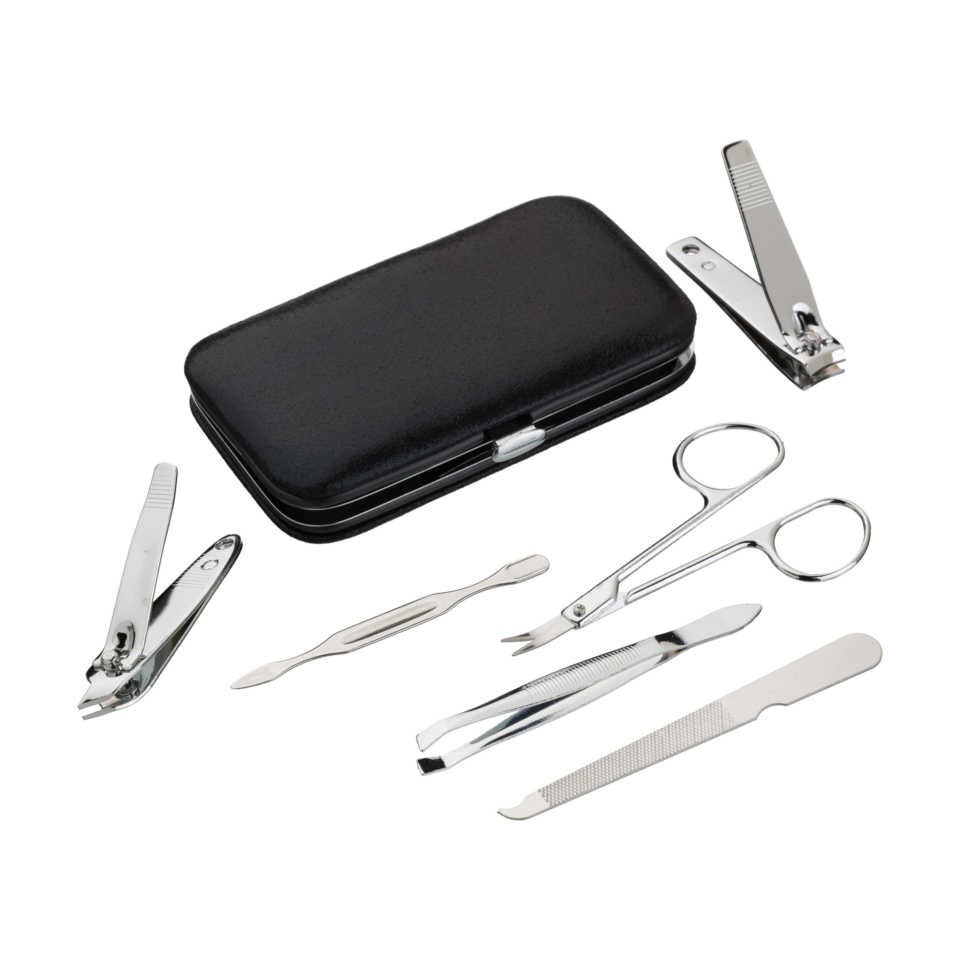
1. Nail clippers and a nail report: These devices are necessary for molding and trimming down your nails.
2. Cuticle drug dealer or orangewood stick: Utilize this resource to push back your follicle gently.
3. Follicle nippers: If you possess any type of hangnails or excess cuticles, these nippers will certainly come in useful.
4. Buffer block or nail buffer: This tool is utilized to smooth out any spines on your nails and make a glossy surface.
5. Base coat, nail polish, and top coat: Choose the colours and finishes that match your style and mood.
6. Read This or pads: These are necessary for removing old gloss and cleaning up any type of errors.
7. Nail polish remover: Look for an acetone-free formula that will definitelyn't dry out out your nails.
8. Hand lotion or follicle oil: Keep your palms moisturized after accomplishing your manicure.
Measure 2: Arrange Your Set
Once you have compiled all the important supplies, it's important to manage them in a means that makes them quickly easily accessible throughout each manicure treatment. You can easily utilize a small cosmetic bag or a compartmentalized compartment to maintain everything orderly and clean.
Different various items right into their personal compartments so that they are very easy to locate when required. This will certainly save you opportunity and stop any disappointment while carrying out your manicure.
Step 3: Prepare Your Nails
Before you begin using polish, it's necessary to prepare your nails adequately. Start through removing any aged polish utilizing cotton rounds or pads saturated in nail gloss cleaner. Gently massage the cotton over each nail until all tracks of aged polish are gone.
Next off, cut and form your nails utilizing the nail clippers and report. It's significant to file in one path only to avoid splitting and peeling. Once you have achieved your wanted design, use a barrier block or nail buffer to refine out any type of spines on the area of your nails.
Action 4: Take Care of Your Follicle
Well-balanced follicle are crucial for sustaining sturdy and stunning nails. Use a tiny amount of cuticle oil or hand cream onto each cuticle and gently rub it in. This will definitely assist soften the cuticles, creating them easier to drive back or remove utilizing a cuticle pusher or nippers.
Be careful not to trim as well much of the cuticle as this may lead to bleeding and infection. Merely clear away excess hangnails or loosened pieces of skin around the nail mattress.
Step 5: Administer Nail Polish
Currently comes the entertaining part – using nail polish! Begin with a base coating that will defend your nails from staining and aid your manicure last much longer. Use one slim coating, allowing it to dry fully just before moving on to the following step.
Choose your wanted different colors of nail polish and apply two thin layers for an even coating. Enable each coating to dry before applying another coating. Complete off along with a leading layer that will definitely seal off in the color and add sparkle to your manicure.
Step 6: Clean up Up Any sort of Blunders
No matter how mindful you are, there may still be some errors or excess gloss around your nails after app. Dip an orangewood stick or cotton swab into some nail gloss eliminator and properly clean up any kind of smears or errors around the nail mattress.
Action 7: Last Touches
Once your nails are completely dry out, use a tiny volume of palm lotion or follicle oil to moisturize your hands and keep your cuticles healthy. This will certainly also provide your manicure a professional-looking appearance.
And there certainly you have it – a step-by-step guide on how to put together the perfect DIY manicure package. Along with the best resources and a little practice, you can attain salon-quality results in the comfort of your personal home. So go ahead, treat yourself to a relaxing DIY manicure and take pleasure in beautiful nails all year round!